Embedded Programming
We programmed the board that we made two weeks before. I tried various programming languages programming environment.
We programmed the board that we made two weeks before. I tried various programming languages programming environment.
Data sheet is like the bible of the components, you get to know the why, how and what of the components
I am an electronics novice so I had to struggle and get the datasheet
Here are a few things I got from the datasheet
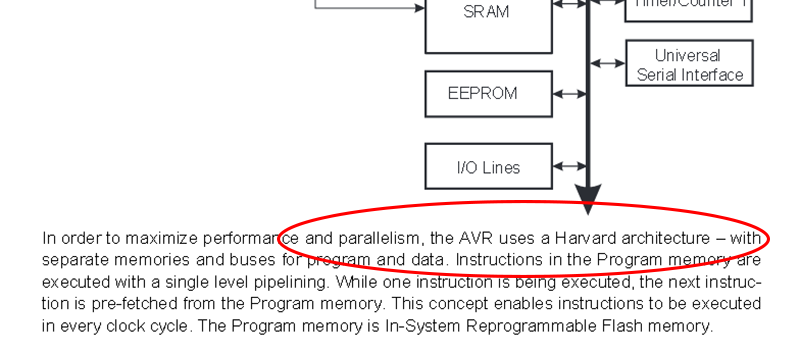
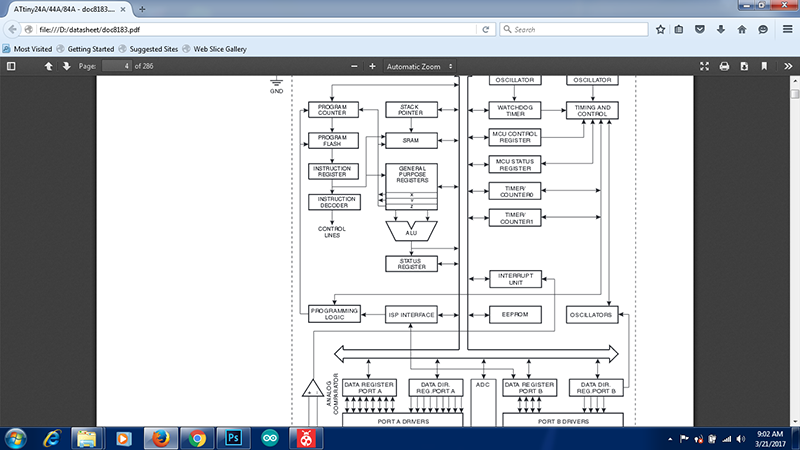
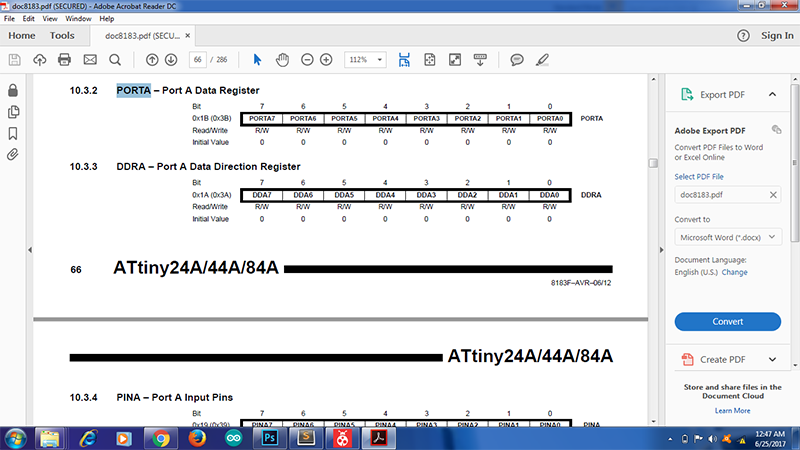
We are using Attiny44 as a microcontroller on our hello board, which uses a Harvard Architecture which excutes a insructions in a single clock cycle
There are 12 general purpose I/O pins, 32 general purpose working register.
There are 3 types of memories in ATTiny 44 as, Data memory space and program memry space, in addition it has EEPROM memory space for storage.
I realised that all the doubts you have about a component will be cleared if you go through the datasheet.
Almost all the components have a datasheet, motors, ICs, sensors, it might seem intimidating at first but you soon start reading the datasheet
I not gone through the entire datasheet, but I was able to figure out which pins could be assigned what functions and why.
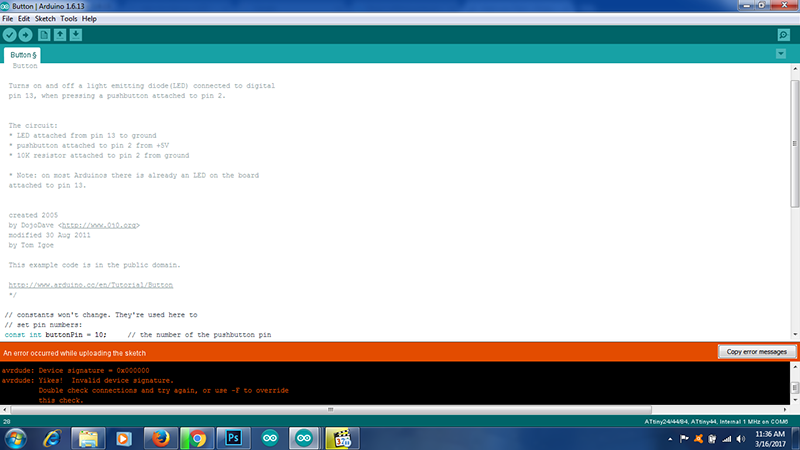
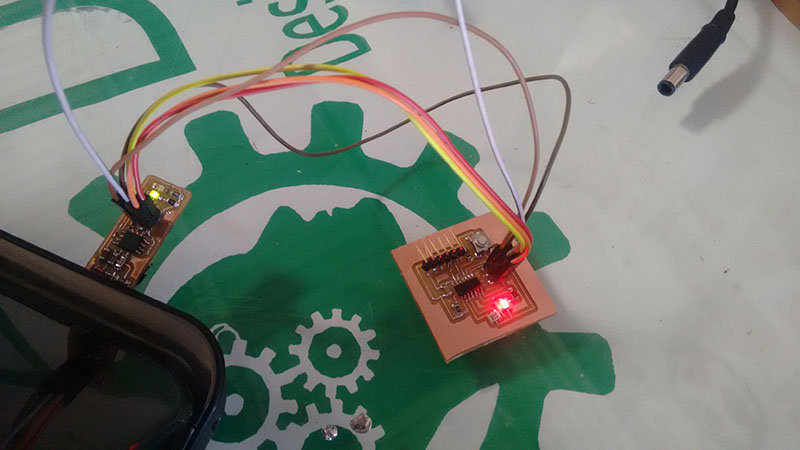
The board hello board I made was showing connection errors, thus it took me some more days to get it running, I tried a joining with a few jumper wires but I failed to work, thats when I started to make a new one
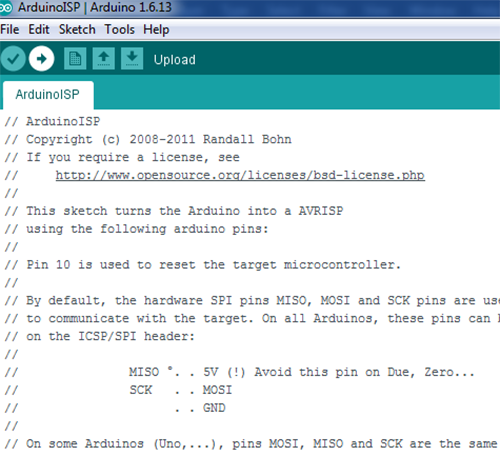
I am still working on my FabISP that is why I used arduino Uno as my programmer to program my board. I had a lot of errors
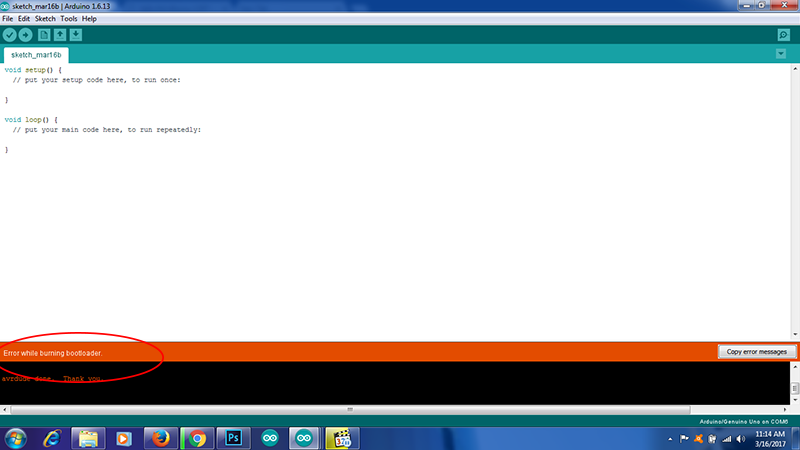
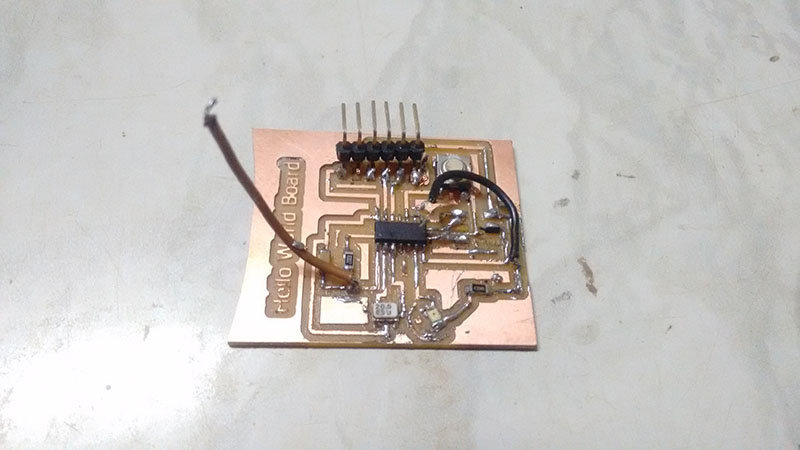
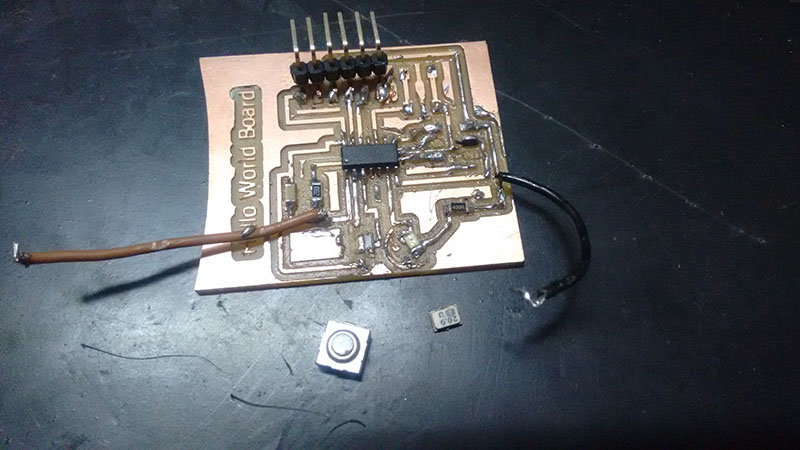
Now that my board is ready I am ready to program the board.
First I downloaded arduino IDE, and used arduino board as my programmer, as I am still fixing my FabISP .
I found a good link which has documented how to set up arduino as a programmer to program ATTiny44. here is the link
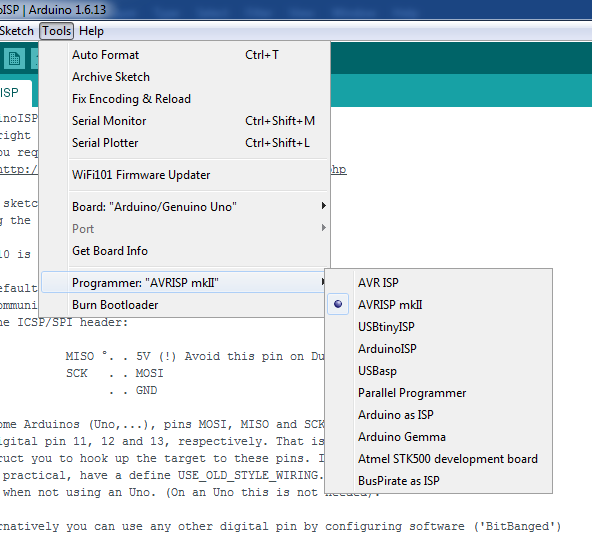
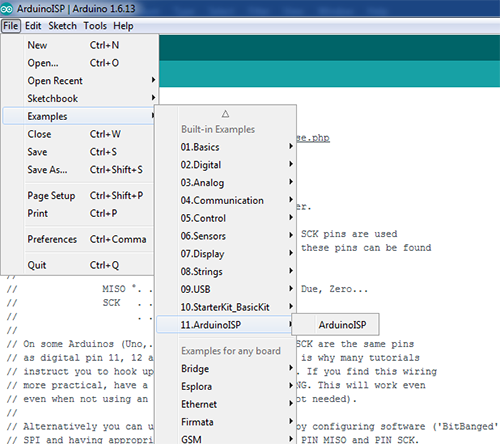
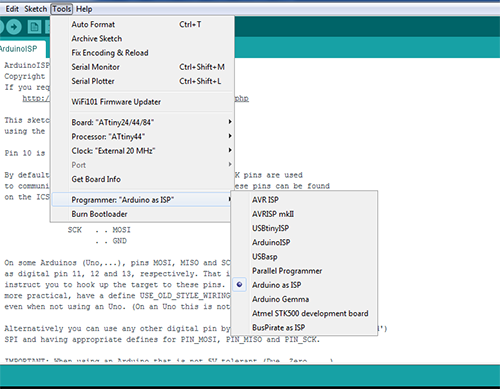
Select the board and port and run the program of Arduino as ISP from the examples
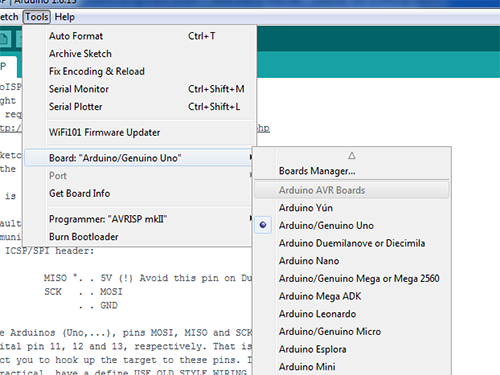
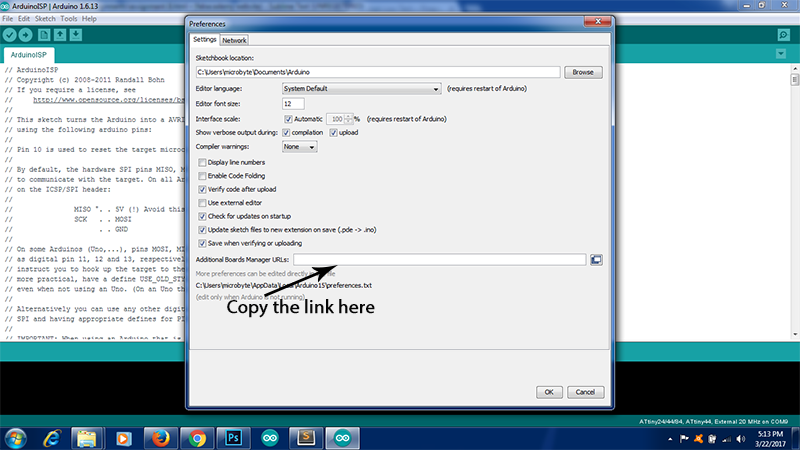
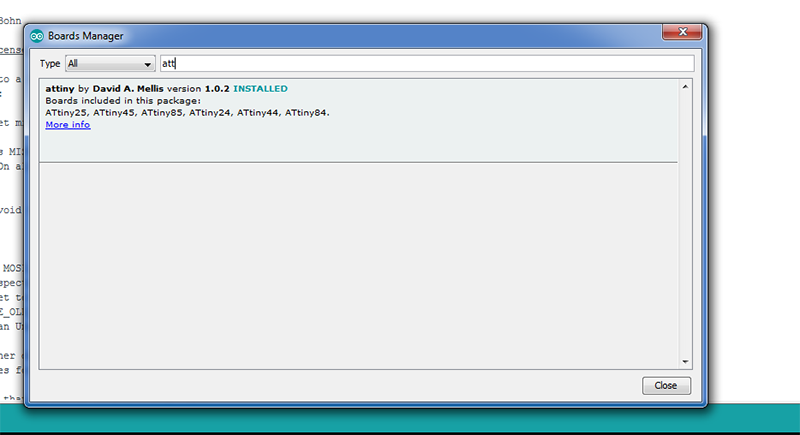
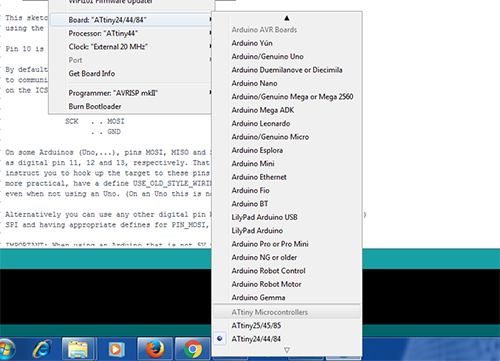
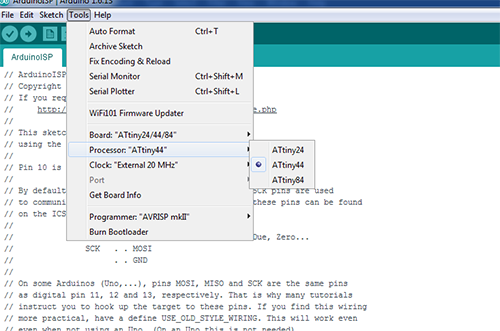
By default we don not have Attiny 44 as in the boards list in arduino IDE, we need to add it.
For this first I go to the prefrences in the file menu copied this link https://raw.githubusercontent.com/damellis/attiny/ide-1.6.x-boards-manager/package_damellis_attiny_index.json
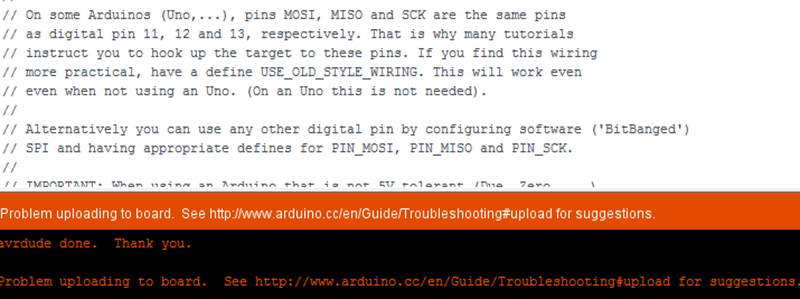
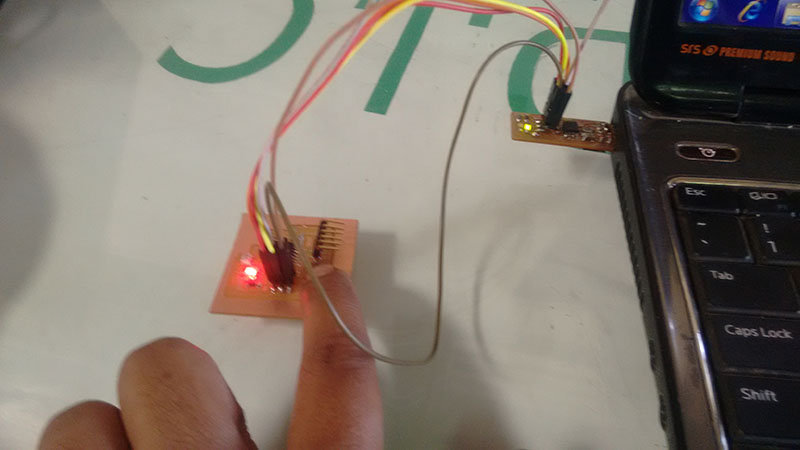
After this we have I connected my board to the arduino, usin the following configuration show in the program of arduino as ISP
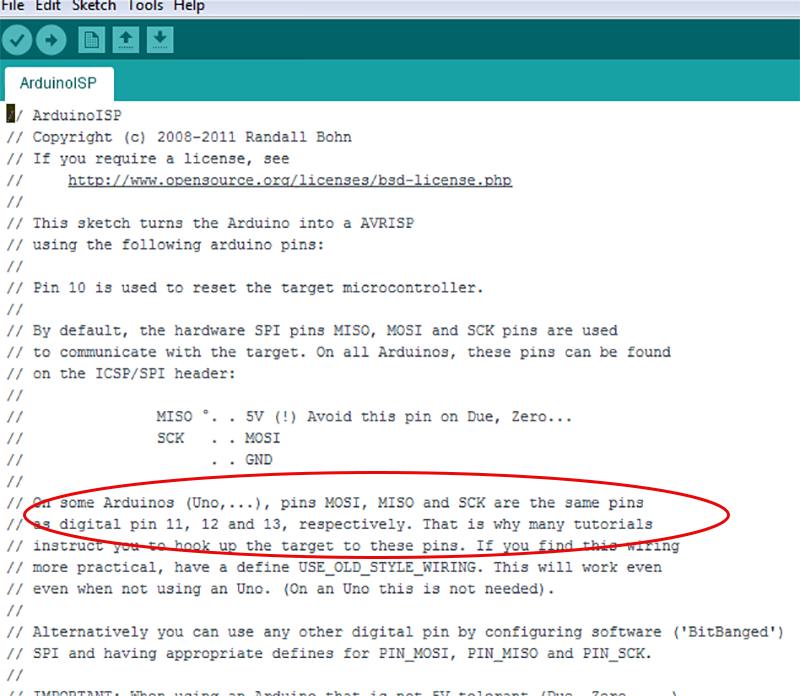
And make the following changes in the program in arduino IDE
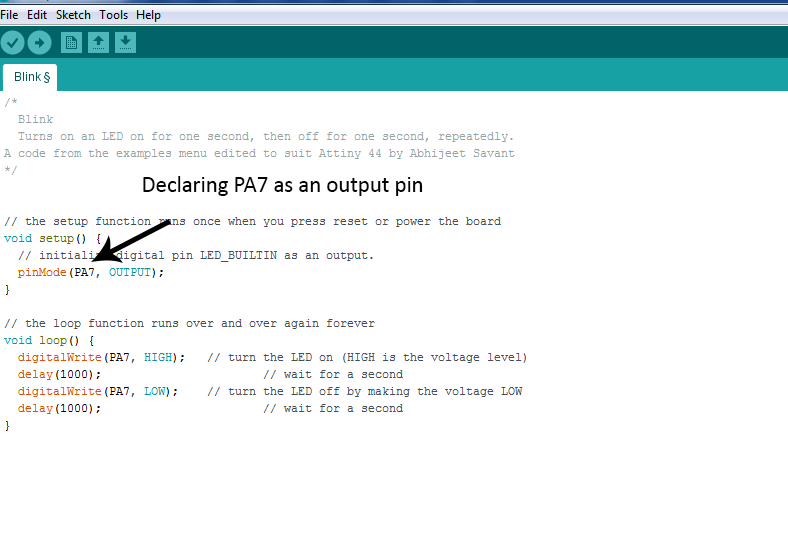
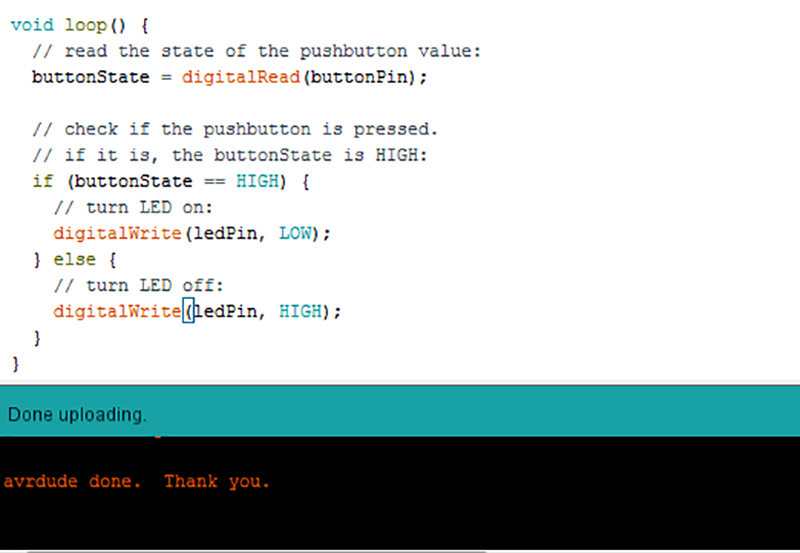
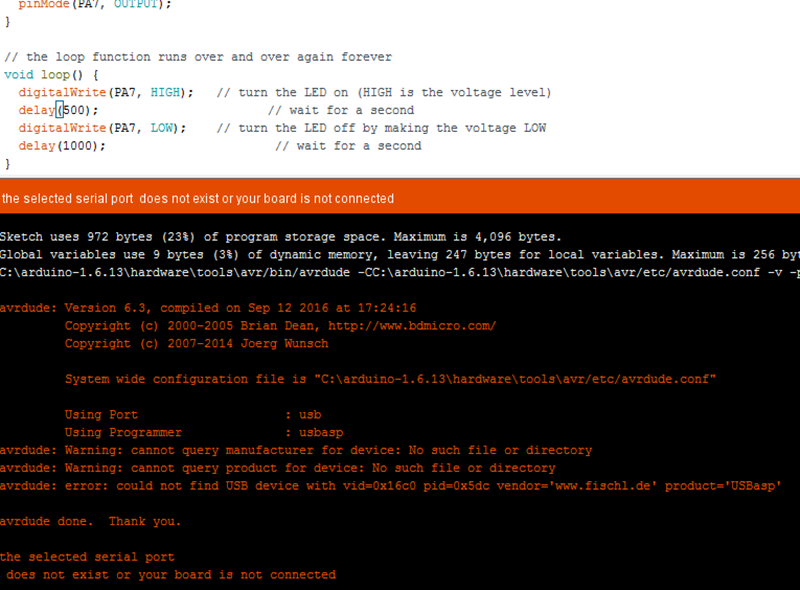
Here I have used the code from the examples to make the led blink, download it from here
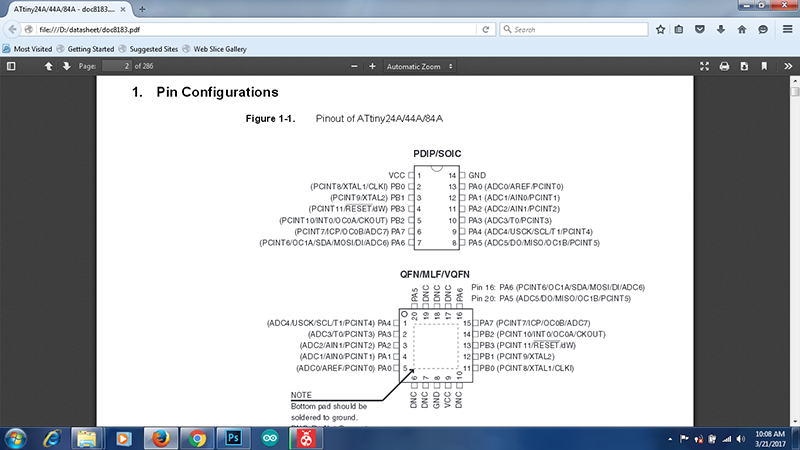
What I have done here is that the default value of the input pin is 13, I changed it to PA7, as referring to the datasheet and knowing the pin to which the led is connected
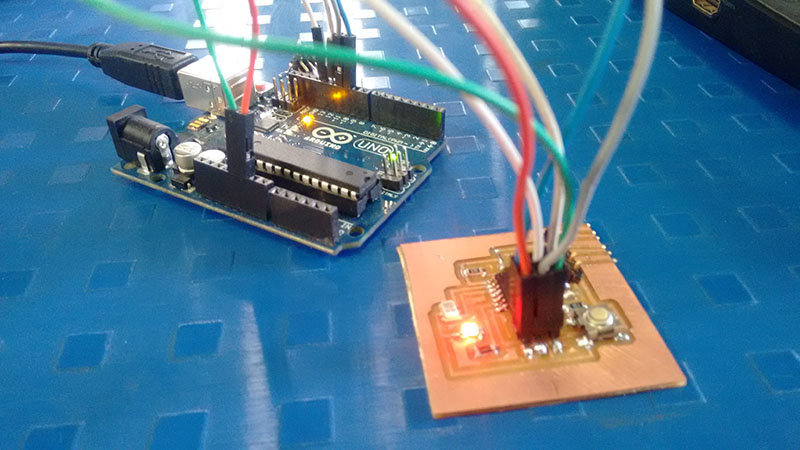
Now I wanted to try running it using the FABISP, I borrowed a FABISP from my instructor and I went on
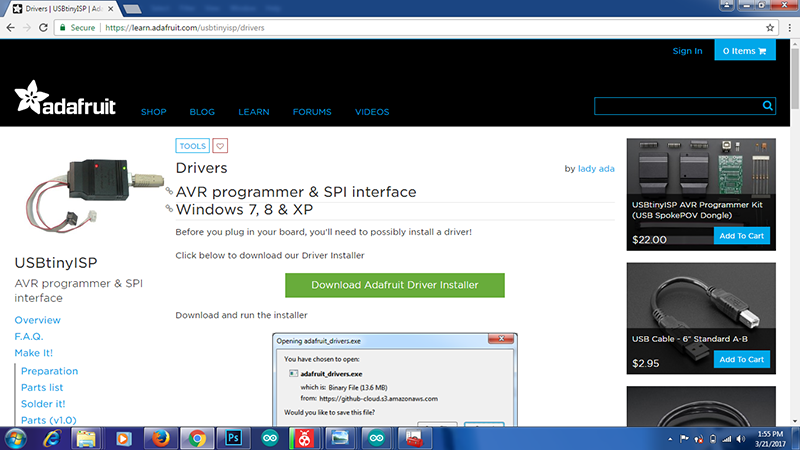
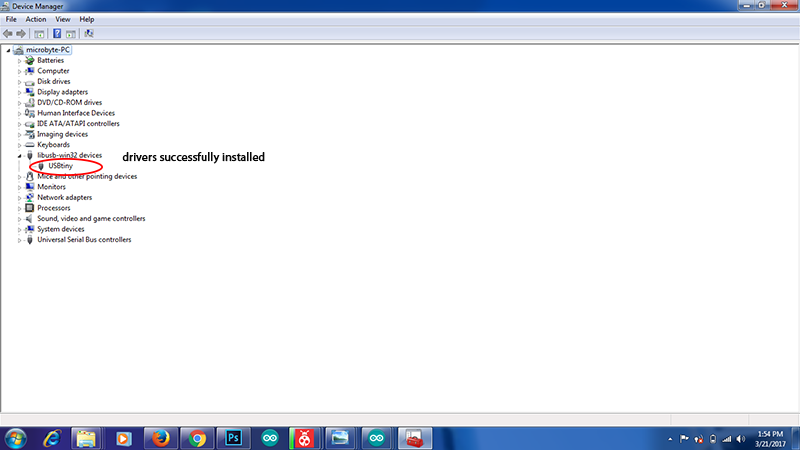
My machine does not have drivers for USBtiny installed, thus I installed it from this link
In the device manager I selected update drivers and selected the location where I had downloaded the files
My insructor suggested me I try this software to load myy .hex file
You can finf the link here
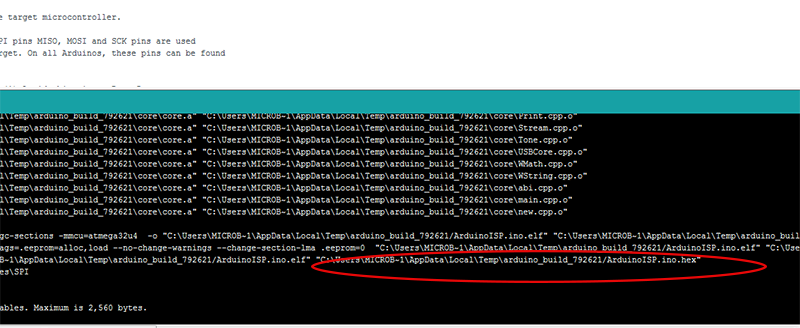
To get the hex file we have to get it from the adresss given in the arduino IDE,
This is a very easy method to do, we just have to select our board Attiny44 in my case and hit auto, and it should work.

Thus I succesfully programmed the board using
Arduino as a Programmer with as arduino IDE as a compiler
FabIsp as a programmer with as arduino IDE as a compiler
and USBasp as a programmer using progisp
I got my FabIsp working and I had done a lot of programming using arduino IDE, now it was time try avrdude in Ubuntu and try the same using make files
The Schedule page of the Fabacademy has all the files required to do this, there is also a great tutorial about programming in the programming section.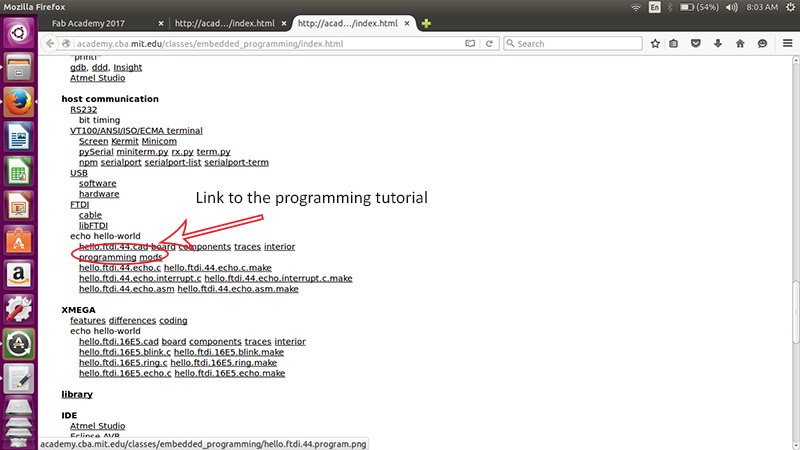
I downloaded the make file and the C file for the LED blink programming from the schedule page
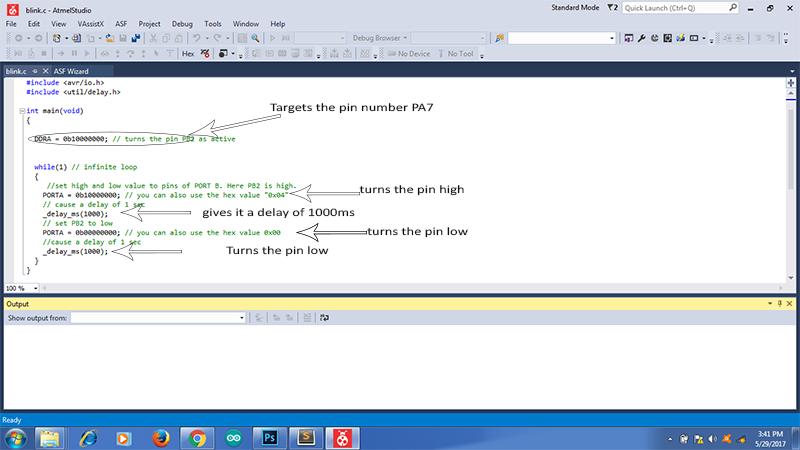
The make file has all the commands neccessary to burn the program in the c file into the target IC where as the C file has the code of the program we want to burn in the IC. In my case the code is to blink make the pin no PA7 high and give it a delay of ms

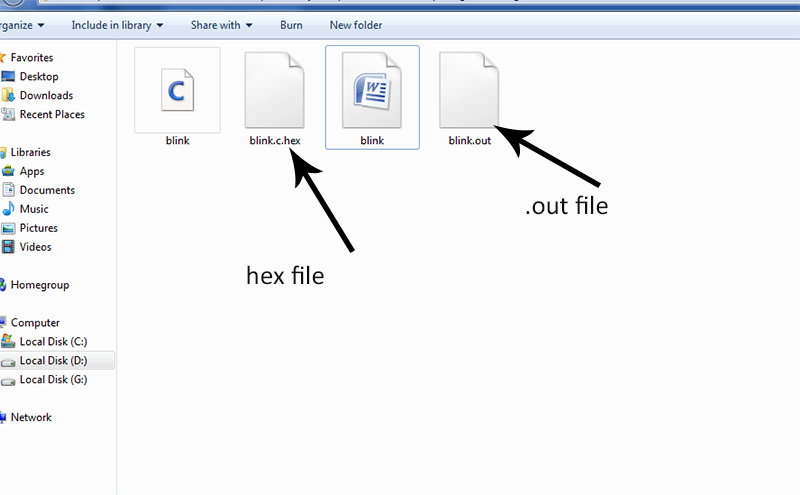
I typed the following commands to burn the code into the IC, 1) make-f blink -This created the hex and out file in the same folder.The hex file contains commands in hexadecimal language which can be interpreted by the IC When we give flash command it is this file which is burned in the IC.
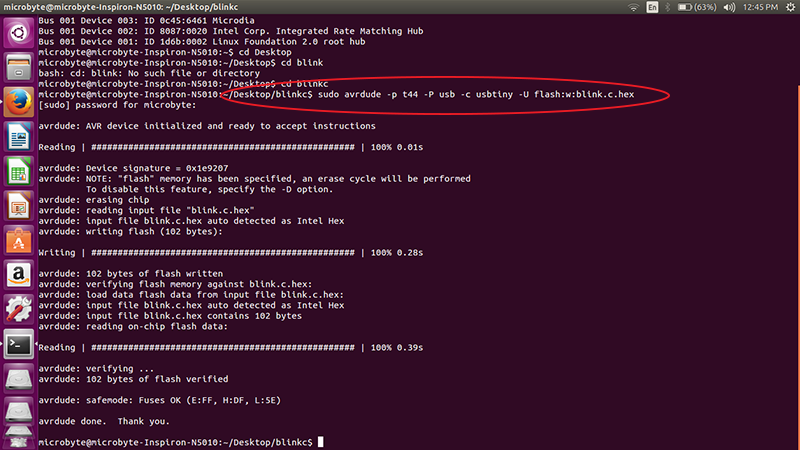
Next I will directly target the hex file in the command sudo avrdude -p t44 -P usb -c usbtiny -U flash:w:blink.c.hex
We will see some progress bars and the program is burnt into the IC, the led will start blink with one second delay.
Wow finally everything that I did in the electronics week all this while is making sense now
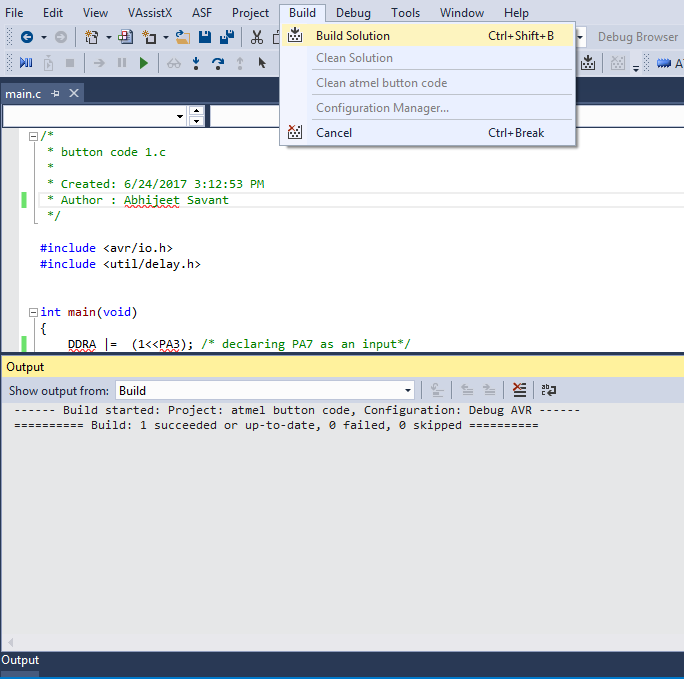
I realised that arduino has made programming very easy, it is really easy to understand and write codes in arduino, but I wanted to try using embedded C, thus I downloaded Atmel Studio, it has its own IDE.
I tried to write a simple code of push button and led. Download the Atmel file from here also the c source file from here
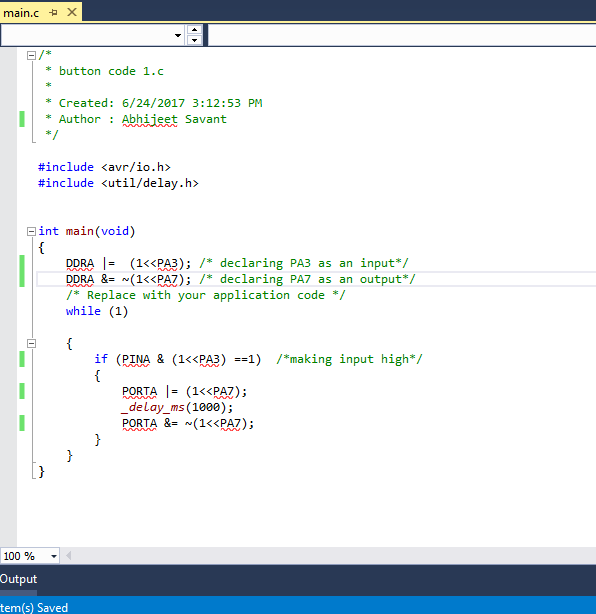
All this will make sense if we go through the datasheet and understand Data Dirction Register, PORT and PINs etc, I tried to understand this from the datasheet
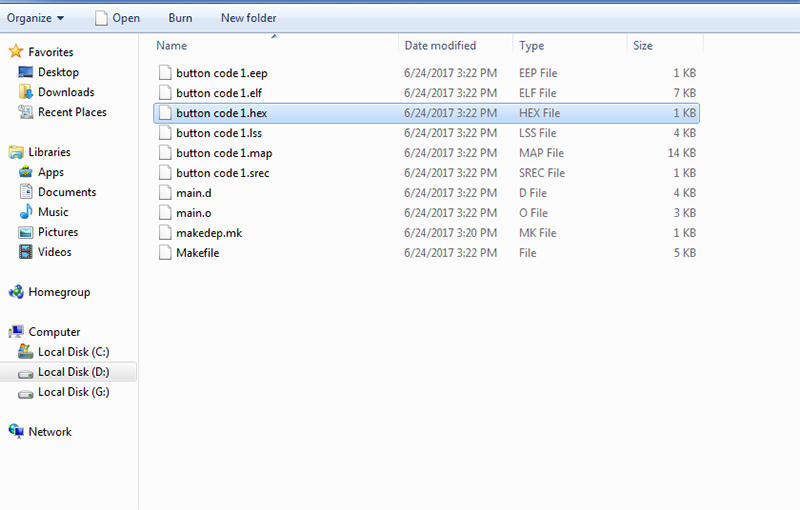
When we built a code in the Atmel studio it generates a .hex file which can be burnt in the IC using prog ISP as expalind before. Or it can be done through Avrdude as explained in the previous section. Download it from here
This assignment is an introduction to a very vast subject of embedded programming, I would really love to explore this. Atleast I am not a newbie now.
First thing I need to figure out is how to assign a pin number in the embedded C programming language, there are a lot of ways to do that
For eg- data dirction register for PA7 can be written as DDRA =0b10000000 or it can be written as DDRA&= ~(PA7), I still have a long way to go with knowing the syntax of Embedded -C
Neil uses this definition in some of his codes in the schedule page of fabacademy, here is one screen shot

I refered a few internet videos, not any specific but googled to see how to use Atmel studio and Embedded C and I have reached this point, although for a novice like me Arduino is a great place to start